How - To's
Please find below helpful instructions. If you need any further assistance, please contact us with the form here.
------------------------------------------------------------------------------------------------------------------------------------------------------------------------------
“Proofing Photos / Lists”
“Proofing” and what is it? The concept of proofing is a process of review and selection of a client’s photos by the client which is then shared with the photographer. The photographer then uses this information to make final edits and changes to selected photos before final delivery and presentation. This process is efficient for both parties and yields quicker turnaround times. The process of proofing your photos can be fun but may require more time and consideration than single viewing might allow. The website has some tools to assist you in this process.
1st - You need to look through all your photos.
2nd - Begin selecting the photos you like. The easiest way to do this is to first click on the "Select Photos" tab (figure 1) which opens a "Click photos to select" drop-down menu (figure 2) and you can now check mark the images you like (figure 3). Check marks can only be made to images in the “thumbnails” page. A closer look at each picture is available by clicking on it. Each image marked with a check mark will remain checked until deselected, even if you come back to your proofing at a later time.
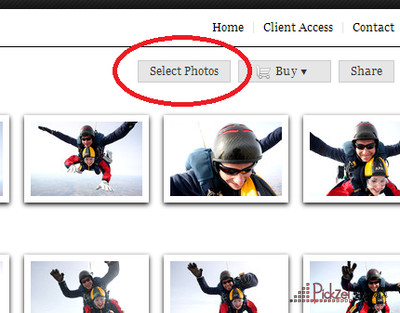

(figure 1)
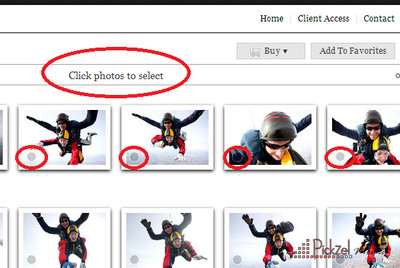
(figure 2)
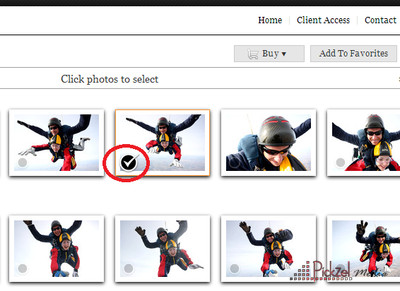
(figure 3)
3rd – After check marking all the images you like or would like to consider for further editing you then add them to your “Favorites.”
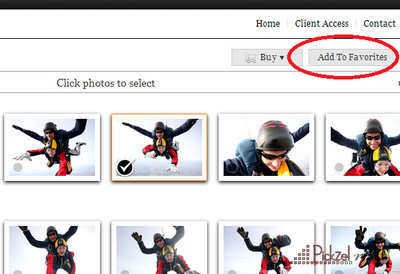
A drop-down menu will appear in the upper left corner of your screen indicating that your photos have been added to your favorites list. The total number of photos in the favorites list will be indicated in the parentheses. To view your favorites list, simply click on "My Selection." You can return to your photo page at anytime.
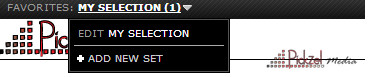
You may add images one at a time, in groups, or all at once. You may also stop and resume this process at anytime. Should you change your mind for some of your selections you may also remove images from your favorites list at anytime while viewing that page. (It’s important to note, however, the actions suggested here requires “cookies” to be saved to your computer. If these cookies are subsequently deleted, your favorites list maybe lost.)
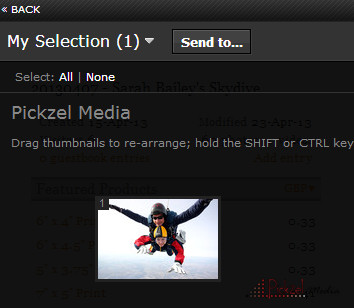
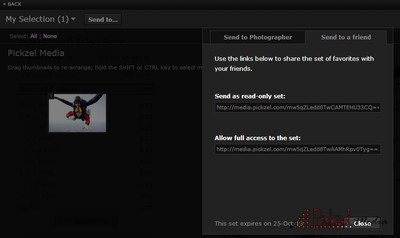
4th - Once you’ve selected your images you can then share that list with me (photographer) directly for editing. To do this, click the "Send to..." option in the upper left corner. A window will appear giving you the option to send to photographer or a friend, in this case, select the photographer. Fill in the necessary information including any special instructions or comments, then select "Share."

5th- Once your images have been edited they will be uploaded into a new subfolder.
You can also create more than one favorites lists to consider for proofing or sharing. A separate list could include images that you would like to have in black and white, for example, or other such specific modifications. You could also create a separate list to share with certain friends or family when final editing has been completed. For example, in the case of a wedding, you could create a list that includes photos specific to the bride’s family while having a separate list specific to the groom’s. Each list can be named at the time you create them to help you stay organized.
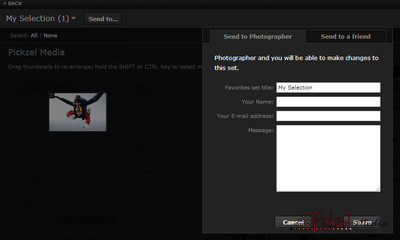
6th – When you’re ready to share with friends, use the “send to” function again while viewing a selected favorites list but this time chose the “send to a friend” option. Here you will see two lines of text. Each represents a direct html link to your favorites list, one allowing for read only (view only) while the other allows users to make changes. (Allowing others to make changes could be helpful in narrowing a selection choice.) With this consideration, copy and paste to your email, facebook, twitter, etc. to share. Important note! If your images are password protected you must also provide your recipients with that information, otherwise, they will be prohibited from viewing. It's also important to note that "favorites" galleries expire 30 days after they've been made.